
Email development is often an overlooked practice due to the peculiarities and constraints that most email clients impose.
If you want to deliver a delightful user experience to your product you have to maintain its design consistent across all the media it is consumed from.
An email is one way your product might be consumed from. It is therefore important that you craft your emails sticking to the same design principles you would follow when developing your product in other contexts.
The email world, though, has its own peculiarities, and the constraints the emails have to be built within often lead to design compromises.
My personal experience with email development
A project I was recently involved in had delivered a new look and feel to the product but it required an email to be sent out about it.
We wanted our email to take advantage of the new designs too and, ideally, also of the tools and components we had already built for delivering the new UI.
For this reason, we decided to build an email development pipeline that would help us achieve this goal.
In this blog post I’m going to focus on the use of React and webpack to build HTML templates to be sent as emails.
Even though I mentioned React, the key aspect of this project is really how webpack has been configured to come up with a small email development environment. I’m pretty sure the same configuration can be easily adapted to work with other frameworks.
The constraints
This project had to allow us to re-use React components in our email development. We also wanted to structure it so that it would allow for more than one email template to reuse our existing components library.
Finally, we wanted to be able to produce, as output, a single, standalone HTML file.
Let’s get started
I created and pushed an example project on GitHub. Check it out if you’re impatient 🙂
The project structure
We’re gonna structure the project in a way that allows multiple email templates to be crafted and hosted in the same repository.
.
├── output/
├── package.json
├── README.md
├── src/
│   ├── components/
│   │   └── SectionOutline/
│   │       ├── index.js
│   │       └── index.scss
│   ├── index.js
│   └── templates/
│       └── HelloWorld/
│           ├── index.js
│           ├── index.scss
│           └── index.test.js
├── webpack.config.js
└── yarn.lock
- The
templatesfolder will contain all the email templates that will be built, pre-rendered and published into the output folder - The
componentsfolder will contain all the reusable ReactJS components you want to reuse across templates - The
outputfolder contains the resulting HTML output of the template you chose to build
webpack.config.js
The webpack configuration file is probably the most important bit in this project. The build configuration will take care of picking the right template to build by injecting all the information it needs and pre-rendering it to HTML.
Let’s start with the header of our webpack.config.js.
const path = require('path');
const webpack = require('webpack');
const HtmlWebpackPlugin = require('html-webpack-plugin');
const PrerenderSPAPlugin = require('prerender-spa-plugin');
const HTMLInlineCSSWebpackPlugin = require('html-inline-css-webpack-plugin').default;
As you can see, the configuration is importing a few useful plugins.
In particular, PrerenderSPAPlugin, will take care of pre-rendering the whole template and generate a static HTML out of it. This is achieved using puppeteer behind the scenes.
Another important bit, here, is HTMLInlineCSSWebpackPlugin that will help us convert our css into an internal <style> node within our generated HTML. This is particularly useful for emails.
A dynamic entry
We want to be able to compile a single template out of all the ones available in the templates folder. In order to do this, we will create a function that will return the configuration hash to be exported for the webpack configuration.
const config = (env) => {
  return ({
    mode: 'production',
    entry: {
      // this will be filled in dynamically
    },
    output: {
      filename: '[name].js',
      path: path.join(__dirname, 'output'),
    },
    module: {
      rules: [
        {
          test: /\.(scss|css)$/,
          use: [
            'css-loader',
            'sass-loader',
          ],
        },
        {
          test: /\.js$/,
          exclude: /node_modules/,
          use: {
            loader: 'babel-loader',
          },
        },
      ],
    },
    plugins: [
      new PrerenderSPAPlugin({
        staticDir: path.join(__dirname, 'output'),
        indexPath: path.join(__dirname, 'output', `${env.entry}.html`),
        routes: ['/'],
        postProcess: context => Object.assign(context, { outputPath: path.join(__dirname, 'output', `${env.entry}.html`) }),
      }),
      new HtmlWebpackPlugin({
        filename: `${env.entry}.html`,
        chunks: [env.entry],
      }),
      new HTMLInlineCSSWebpackPlugin(),

      // the DefinePlugin helps us defining a const
      // variable that will be 'visible' by the JS code
      // we are rendering at runtime
      new webpack.DefinePlugin({
        "EMAIL_TEMPLATE": JSON.stringify(env.entry),
      }),
    ],
  });
};
As you can see, the mandatory entry field has not been set yet. We will handle it later, and we will require it to be passed in by command line.
The entry will be used to load the right template by passing its value to the PrerenderSPAPlugin. It will also be used to tell HtmlWebpackPlugin how to name the result file.
Finally, we export the configuration the way webpack expects it to be exported:
module.exports = (env) => {
  const entry = {};
  entry[env.entry] = './src/index.js';
  const cfg = config(env);
  cfg.entry = entry;
  return (cfg);
};
Whatever entry we specify, we will always associate it with our entrypoint: index.js.
The index.js file is what is reponsible of loading the template and embedding it into our email layout.
Check out the full webpack.config.js for more information.
A dynamic template
This is the content of the index.js file:
import React, { PureComponent } from 'react';
import ReactDOM from 'react-dom';
import { Box, Item } from 'react-html-email';

/*
 * The EmailContainer will be the body of your Email HTML body.
 * It will receive the right template to load and inject from Webpack
 * and will attempt to load it here and include it in the DOM.
 *
 * This class expects the EMAIL_TEMPLATE const to be defined.
 */
class EmailContainer extends PureComponent {
  render() {
    // EMAIL_TEMPLATE is defined by the webpack configuration and enables us
    // to include the right template at compile time
    const Template = require(`./templates/${EMAIL_TEMPLATE}`).default;
    return (
      <Box width="600px" height="100%" bgcolor='#f3f3f3' align='center'>
        <Item align='center' valign='top'>
          <Template />
        </Item>
      </Box>
    );
  }
}

ReactDOM.render(<EmailContainer />, document.body);
This is where the magic happens. Every template will be embedded into this code that will produce the final HTML output for the email. As you can see, I am importing a couple of components from the convenient react-html-email project that takes care of providing a few useful components for the email world.
The Template object is dynamically loaded from the EMAIL_TEMPLATE const string that’s expected to be defined when this code is executed. We’re able to do this because we’re using the webpack DefinePlugin:
// the DefinePlugin helps us defining a const
// variable that will be 'visible' by the JS code
// we are rendering at runtime
new webpack.DefinePlugin({
  "EMAIL_TEMPLATE": JSON.stringify(env.entry),
}),
The plugin will take care of setting the const to the full path of the email template I am interested in rendering. In our case the HelloWorld template.
Run it
yarn webpack --env.entry=HelloWorld
The resulting HTML will be stored in the output folder.
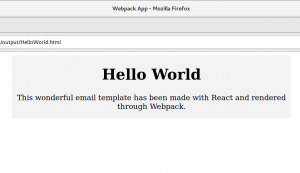
I know. Not the most beautiful email, but I’ll leave the design to you. 🙂
I hope you enjoyed the post. Let me know if you have any feedback. Don’t forget to check out the full project on GitHub.
Also published on Medium.
Leave a Reply