
In this blog post I’ll show you how I used free services available to anyone to build a little proxy server for my app to overcome certain CORS limitations for my Single Page App.
I built Chisel to help with some repetitive API responses composition and manipulation that I was doing at work.
It’s a single page app that allows you to perform requests against any API endpoint and compose results to extract only what you need. It also allows for CSV exports. Pretty straightforward.
Being it still in its earliest days I decided that I wanted to build it with the simplest architecture in order for me to be able to iterate quickly. I went for the JAMstack, built it in React and deployed on Netlify.
Since it doesn’t have a back-end server it talks to, anything you do stays on your machine. Unfortunately, not all APIs allow for cross-origin requests so, in certain cases, you won’t be able to perform any request from your browser unless you enable the proxy functionality.

What happens if you don’t is that your browser will attempt a CORS preflight request which will fail if the API doesn’t respond with the expected headers.

What is CORS and when is it a problem for your Single Page App?
From the MDN documentation:
Cross-Origin Resource Sharing (CORS) is a mechanism that uses additional HTTP headers to tell browsers to give a web application running at one origin, access to selected resources from a different origin. A web application executes a cross-origin HTTP request when it requests a resource that has a different origin (domain, protocol, or port) from its own.
https://developer.mozilla.org/en-US/docs/Web/HTTP/CORS
Now, there are certain requests, called Simple Requests, that don’t trigger CORS checks. Unfortunately, these type of requests are quite limited and don’t allow to pass certain headers like the Authorization one (e.g. a basic-auth request). You can read more about these type of requests here.
For this reason, we’re going to allow a good set of HTTP methods and headers to pass through our proxy and return back the response as unchanged as possible.
The bulk of the work will be configuring the right set of Access-Control-Allow-* headers to be returned back to the browser when CORS preflighted checks are performed. I recommend you have a look at the MDN Documentation to learn more about CORS as it is quite comprehensive.
The proxy
In order to allow any request to pass the CORS preflight checks I built a simple proxy server that returns the expected headers to the browser and passes through the requests to the destination server.
You can find the source code for it on Github, but let’s go through the steps to build your own for free.
Setting up NGINX
The proxy itself is a simple instance of NGINX configured with a server to allow for proxied request to a dynamic destination.
In order to be able to run NGINX on Heroku we have to make some changes to run it as non-privileged user.
We’re basically making sure that NGINX will try to write to unprivileged writeable locations: this is because Heroku enforces that our container runs as non-root. You can read more about it here.
Accounting for any URL
The second aspect of this configuration is actually defining our dynamic proxy: we will translate requests to any URL so that they will expose the right CORS information.
The main complexity of the Chisel case resides in the fact that we want to allow any URL to be proxied. This is because we won’t know in advance what URL the user will type in, of course.
The way NGINX allows for setting up the proxy functionality is through the proxy_pass directive:
Sets the protocol and address of a proxied server and an optional URI to which a location should be mapped. As a protocol, “
The NGINX documentationhttp” or “https” can be specified.
In order to be able to specify the URL to pass to dynamically I decided to go with a custom header: X-Chisel-Proxied-Url. This way Chisel will use that header to tell the proxy which destination to proxy through to.
proxy_pass $http_x_chisel_proxied_url;The $ symbol in NGINX is used to reference variables and the HTTP headers get automatically converted to $http_ prefixed variables using the above syntax.
There’s quite a bit of things to go through in this NGINX server configuration. Let’s start with the location / block first.
The first bit in there is the if statement: it handles the CORS preflighted requests case and it basically allows for a bunch of HTTP methods and headers by default. It restricts everything to the https://chisel.cloud Origin, just because I don’t want my proxy to be used by other applications.
proxy_redirect off: I disabled redirects for now. I’m still not sure how I’m going to handle them so I decided to turn them off until I can find a use case for them.proxy_set_header Host $proxy_host: this is simply forwarding the destination host as theHostheader. This is a requirement for valid HTTP requests through browsers. This value will be exactly the same as the one being set forproxy_pass.proxy_set_header X-Real-IP $remote_addr: here we’re simply taking care of forwarding the client IP through to the destination.proxy_pass $http_x_chisel_proxied_url: this is the real important bit of the whole configuration. We’re taking the header coming in from the Chisel client application and setting it as the URL to pass through to. This is effectively making the dynamic proxy possible.proxy_hide_header 'access-control-allow-origin': this, together with the followingadd_header 'access-control-allow-origin' 'https://chisel.cloud'is basically making sure to override whateverAccess-Control-Allow-Originheader is coming back from the destination server with one that only allows requests from our Chisel application.
Finally, the top two directives.
resolver: this is needed so that NGINX knows how to resolve the names of the upstream servers to proxy through to. In my case I picked a public free DNS. You can pick yours from here.listen $__PORT__$ default_server: this one, instead, is the directive that makes everything possible using Docker on Heroku. We will have a look at it later in this blog post, so keep reading!
Building the container image
As mentioned above, I’m going to use NGINX’s base image.

The Dockerfile is pretty simple. We’re replacing the default nginx.conf with our own to make sure that NGINX can run unprivileged. We’re also copying our proxy server configuration.
As you can see I have named the file as proxy.conf.tpl. I’ve done this to be explicit about the fact that the file is not ready to be used as is. We will have to dynamically edit the port it is going to listen on at runtime before starting NGINX.
As clarified in the documentation, Heroku expects the containers to be able to listen on the value specified within the $PORT environment variable. The solution we’re using here, then, is making sure to replace the $__PORT__$ placeholder I have included in the configuration with the actual content of the $PORT environment variable.
Setting up Heroku
We’re almost there. Now we need to configure our application so that we can deploy our container straight from our repository.
Create a new lovely app on Heroku so that we can prepare it to work with containers.

Next, let’s configure the app to work with container images. I haven’t found a way to do it through the dashboard so let’s go ahead with the command line.
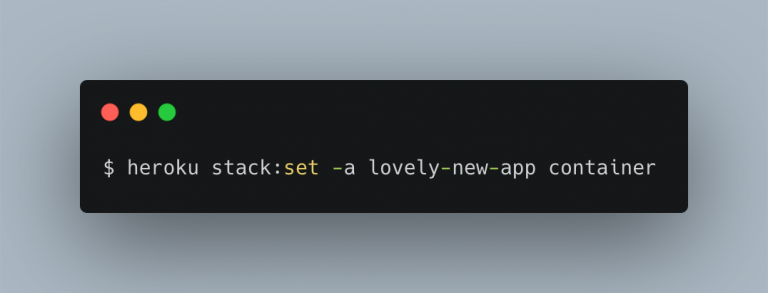
Now add a simple heroku.yml file to your repository so that Heroku knows what to do to build the image.
build:
  docker:
    web: Dockerfile
Simple as that.
Now, in the Deploy tab of your application dashboard, make sure you connect your repository to the app: this way you’ll be able to deploy automatically.

Your proxy is finally ready to go. Once you kick off the deploy you’ll be able to see it start up in the application logs as follows.

As you can see, the process is being started using the command we have specified through the CMD directive and the PORT value is being injected by Heroku.
With the proxy up you’ll now be able to forward your requests through the proxy. As mentioned above, you will need to use the custom X-Chisel-Proxied-Url header (or whatever header you decide to configure for your proxy) to specify the original URL the user intended to hit.
As you can see from the animated gif below, the proxy feature allows to overcome the CORS limitation when hitting the Nager.Date API from Chisel.
Conclusion
We have just built a proxy server reusing open-source technology. This allows us to keep our Singe Page App separate from the server logic that’s needed to overcome the CORS limitations.
In general, CORS is one of the security measures your browser employs to mitigate certain opportunity for hijacking your website to perform unintended activity. Even if we have just examined an opportunity for bypassing this limitation, always think twice about whether it is appropriate or not for your use case.
I hope you enjoyed this quick walk-through to build your own free proxy server. Don’t forget to follow me on Twitter for more content like this or subscribe below.
Leave a Reply